 MiniBook X 2023
 GemiBook XPro
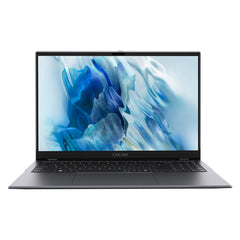
 CoreBook X
 FreeBook N100
 GemiBook Plus
 UBook X 2023
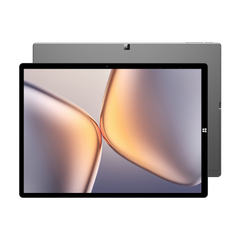
 Hi10 XPro
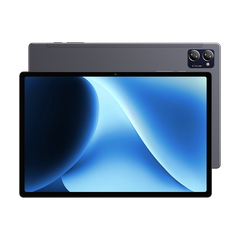 HiPad XPro
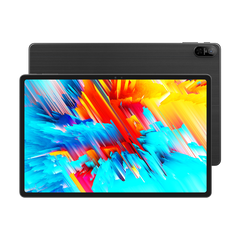 HiPad Max
 LarkBox X 2023
 CoreBox 4th
 HeroBox
 CoreBox 5th

CHUWI Official STORE- Smart Tech, Wise Life – CHUWI

Frequently Asked Questions And Answers
FAQ
Why the tablet is running slow on WiFi?
There could be several reasons why Bluetooth is not working on your tablet. Here are a few troubleshooting steps you can try:
1. Make sure that Bluetooth is turned on: Go to your tablet's settings and check if Bluetooth is turned on. If it's turned off, turn it on and try connecting again.
2. Restart your tablet: Sometimes, simply restarting your tablet can help fix the issue. Try turning it off and on again.
3. Make sure the device you're trying to connect to is compatible: Ensure that the device you're trying to connect to is compatible with your tablet's Bluetooth version.
4. Clear Bluetooth cache: Go to your tablet's settings, find the Bluetooth menu, and clear the cache. This will remove any corrupted data that might be interfering with the connection.
5. Check for interference: Bluetooth signals can be blocked by other wireless signals, so make sure there are no other wireless devices nearby that might be causing interference.
6. Check for updates: Make sure your tablet is up to date with the latest software updates, as this can sometimes fix Bluetooth issues.
If none of these steps work, it's possible that there's a hardware issue with your tablet's Bluetooth. In this case, you can contact us with the serial number of the device for assistance.
Why the Bluetooth is not working?
There could be several reasons why Bluetooth is not working on the tablet. Here are a few troubleshooting steps you can try:
1. Make sure that Bluetooth is turned on: Go to your tablet's settings and check if Bluetooth is turned on. If it's turned off, turn it on and try connecting again.
2. Restart your tablet: Sometimes, simply restarting the tablet can help fix the issue. Try turning it off and on again.
3. Make sure the device you're trying to connect to is compatible: Ensure that the device you're trying to connect to is compatible with your tablet's Bluetooth version.
4. Clear Bluetooth cache: Go to your tablet's settings, find the Bluetooth menu, and clear the cache. This will remove any corrupted data that might be interfering with the connection.
5. Check for interference: Bluetooth signals can be blocked by other wireless signals, so make sure there are no other wireless devices nearby that might be causing interference.
6. Check for updates: Make sure your tablet is up to date with the latest software updates, as this can sometimes fix Bluetooth issues.
If none of these steps work, it's possible that there's a hardware issue with your tablet's Bluetooth. In this case, you can contact us with the serial number of the device for assistance.
Why won’t my tablet charge?
If your tablet is not charging, there could be several reasons why:
1. Faulty charger or cable: One of the most common reasons why a tablet won't charge is due to a faulty charger or cable. Check if the charger and cable are in good condition and try using a
different charger and cable to see if it works.
2. Battery issues: The battery may be drained or damaged, preventing it from charging. If the battery is fully drained, you may need to leave the tablet charging for a while before it starts
charging again. If the battery is damaged, it may need to be replaced.
3. Software issues: Sometimes, software issues can prevent the tablet from charging. Try restarting the tablet or performing a software update to see if it resolves the issue.
4. Charging port issues: The charging port may be damaged or blocked, preventing the charger from making a proper connection. Check if the charging port is clean and free of debris, and try
using a different charger to see if it works.
5. Overheating: If the tablet gets too hot, it may stop charging to prevent damage to the battery. Try charging the tablet in a cooler environment or turning it off while charging.
If none of these steps work, there might be a battery or motherboard hardware issue with the tablet, you can contact us with the serial number of the device for support.
How can I find the product serial number?
Serial number usually can be found on the bottom side of the product, some of the products such as Hipad X have the serial number on the SIM card slot.
Why my tablet automatically power on when I connect it to charge?
Some of CHUWI tablets, such as Hipad Max, were designed to automatically power on when connected to an adaptor in shut-down state, so you won't miss any important message or phone call, it's not a product defect.
The tablet is frozen at the CHUWI logo interface, what should I do?
If your tablet is frozen at the startup logo interface, you can try the following steps to resolve the issue:
1. Perform a soft reset: Press and hold the power button for about 10-15 seconds until the device turns off, then release the button and try to turn it back on.
2. Charge the tablet: Ensure that your tablet has enough charge, and then try to turn it on again.
3. Factory reset: If none of the above steps work, you may need to perform a factory reset. This will erase all data and settings on the device, so make sure to back up any important data before
proceeding. The steps for performing a factory reset can vary depending on the device model, so you can check the device manual or look online for specific instructions.
If the issue persists even after trying all the above steps, it may be a hardware issue, you can contact us with serial number of the device for assistance.
How do I backup my tablet data to prevent loss in case of damage or loss of the device?
Backing up your tablet data is essential to prevent data loss in case of damage or loss of the device. Here are the steps to backup your tablet data:
1. Use Cloud Storage: You can use cloud storage services such as Google Drive, OneDrive, or Dropbox to backup your data. These services allow you to upload your data to the cloud and access it
from anywhere using any device.
2. Connect to Your Computer: You can backup your tablet data to your computer using a USB cable. Connect your tablet to your computer, and then transfer your data to your computer's hard drive.
3. Use Third-Party Backup Apps: There are several third-party backup apps available on the app store. These apps allow you to backup your data to the cloud or your computer. You can choose the
app that suits your needs and preferences.
It's important to make sure you backup your data regularly to prevent data loss.
Is this tablet with 5G data supported?
No, currently CHUWI tablets doesn's support 5G mobile data reception, but all CHUWI tablets are compatible with 5G WiFi band.
How can I reinstall or update drivers?
Most of the driver installation methods are generic. The driver name does not have to be the same as in the tutorial, and It is important to note that if you are reinstalling drivers manually,
make sure to download the driver from official sources to avoid downloading malware or faulty drivers.
1.Identify the drivers that need to be updated: You can identify the drivers that need
to be updated by going to the Device Manager. To access Device Manager, press the Windows key + X and select Device Manager from the menu. If there’s a yellow or red mark next to a device, the
driver might have an issue, it could be outdated or missing.
2.Right-click the device and select "Update driver" from the context menu.
3.Choose one of the following options: "Search automatically for updated driver software" - This option will allow Windows to search for the latest driver software online and install it
automatically. "Browse my computer for driver software" - This option will let you manually select a driver file that you have downloaded and saved on your computer.
4.Restart your laptop: After installing the updated driver, it is recommended to restart your laptop to ensure that the changes are applied correctly.
Manual update:
1.
2.
3.
4.
5.
6.
7.
8.
How can I reinstall the Operating System?
Please notice before the reinstallation:
1.It is important to note that reinstalling Windows will erase all data on your computer's hard drive. Therefore, it is recommended that you backup your data before proceeding with the
reinstallation process.
2.The installation methods are mostly generic, the installation package does not have to be the same as in the tutorial.
3.A USB drive with at least 16GB of storage space is needed.
4.Please keep the laptop power higher than 50%, it is recommended to connect the charger during the installation process.
Reinstallation tutorial:
1.Backup the files on the USB drive and then format the USB drive in NTFS format. Name the volume label of the USB drive as WINPE (if not named as WINPE, the USB drive will not be recognized).
You can refer to the image below.

2.Extract the downloaded system installation package, as shown in the image below.

3.Open the folder named "windows" and copy all the sub-files to the root directory of the USB drive.
4.Insert the USB drive into the laptop, then turn off the power and enter the BIOS
interface (while powering on, keep pressing the Esc key or F7 key), and then select UEFI: Sandisk. Partition.

5. Select to boot from the USB drive, and the laptop will automatically install the Windows system.
6. After the installation is complete, the laptop will automatically shut down. At this time, unplug the USB drive and restart the laptop. If it does not automatically exit the BIOS interface,
type "E-X-I-T" to exit.
How to deal with the problem of automatically entering the BIOS interface when starting up?
1.You can check whether the SSD is recognized in the BIOS.
2. In the BIOS interface, find the options of SATA Configuration or NVMe Configuration (you can refer to the picture), and check whether there is an SSD storage device after entering the
options.
3. If no storage device is detected, that means the laptop has not recognized the storage device, which is an issue with the SSD.
4. If the SSD is displayed, you can download the Windows system installation package and try reinstalling the system.
5. If the issue was not solved after reinstalling the OS, it might be a SSD related issue, you can unplug the SSD and clean the pins, if the problem persists, you can try replacing a new SSD.
1.
2.
3.
Why the laptop doesn’t pair Bluetooth devices?
Make sure your Bluetooth device is turned on and in pairing mode.
1. Check if your laptop has Bluetooth turned on. You can usually do this by looking for a Bluetooth icon in the taskbar or system tray.
2. Restart your laptop and the Bluetooth device you want to pair.
3. Try moving the Bluetooth device closer to your laptop to see if that improves the signal strength.
4. Remove any other Bluetooth devices that are currently connected to your laptop, as they may be interfering with the pairing process.
5. Check if your laptop's Bluetooth drivers are up to date. You can do this through the device manager or by visiting the manufacturer's website and downloading the latest drivers.
6. If all else fails, try resetting your laptop's Bluetooth settings to their default values. You can do this by going to the Bluetooth settings menu in your laptop's control panel or system
settings.
Why the fan runs louder than before?
There could be several reasons why your PC fans are running louder than before. Here are some possible causes:
1. Dust buildup: Over time, dust can accumulate inside your PC case and clog up your fans, causing them to work harder to keep your system cool. This can result in a louder fan noise.
2. Overheating: If your PC is overheating, your fans will work harder to try to cool it down. This could be due to a faulty cooling system, poor ventilation, or a high CPU or GPU load.
3. High workload: If your PC is running demanding tasks, such as gaming or video editing, it will produce more heat, and your fans will have to work harder to keep up.
To troubleshoot the issue, you can try cleaning the dust out of your PC case and checking that all your fans are working correctly. You may also want to monitor your CPU temperatures to see if
they are running hotter than normal.
What should I do if I forget the password?
Unfortunately, for this issue you can only reintall the operating system.
Why the laptop is flickering?
There are several reasons why your laptop screen may be flickering:
Software-related issues: Sometimes, the flickering of the laptop screen could be due to software-related issues such as outdated drivers or incorrect display settings. Try updating your drivers
or adjusting your display settings to fix the issue.
Hardware-related issues: Hardware issues such as a damaged screen or loose cable connections can cause flickering.
Check your laptop's screen for any physical damage, and make sure all the cable connections are properly plugged in.
Battery issues: If your laptop's battery is running low or has a problem, it may cause the screen to flicker. Try plugging in your laptop to see if the flickering stops.
Overheating: Overheating can cause the screen to flicker. Try using your laptop on a flat surface and ensure that the air vents are not blocked.
You can follow these steps to troubleshoot:
1. Restart your computer and enter the BIOS interface to confirm whether there is any abnormal display phenomenon on the screen in the BIOS interface. If there is no such abnormal display, it
can be judged as a software malfunction, and there is no problem with the hardware. You can solve the problem by software debugging and troubleshooting.
2. Check and update the graphics driver.
3. Use an external monitor to assist in troubleshooting.
4. Disassemble the laptop and check if the screen FPC cable is poorly connected. Reconnect and clean the screen FPC cable pins.
If the above steps do not solve the problem, it may be a screen malfunction, you can contact our aftersale service team with the serial number of the device for a repair.
Why the Wi-Fi signal is weak?
There could be several reasons why your laptop's WiFi signal is weak. Here are a few possible explanations and solutions:
1. Distance from the WiFi source: If your laptop is located far away from the router or access point, the signal may weaken. Try moving closer to the WiFi source and see if that improves the
signal strength.
2. Obstructions: Physical obstructions, such as walls or large objects, can block WiFi signals and weaken their strength. Try moving your laptop to a location with fewer obstructions.
3. Interference: Other electronic devices, such as microwaves, cordless phones, and Bluetooth devices, can interfere with WiFi signals and weaken their strength. Try moving your laptop away from
these devices or turning them off to see if that improves the signal.
4. Network congestion: If there are too many devices connected to the same WiFi network, it can cause congestion and weaken the signal strength. Try disconnecting some devices or limiting the
number of devices that are connected at the same time.
5. Hardware issues: If none of the above solutions work, there may be a problem with your laptop's WiFi hardware. Try updating the driver for your WiFi adapter or replacing the adapter
altogether.
Why Windows system said SSD is not recognized?
If your Windows system is not recognizing your SSD, there could be several possible reasons:
1. Loose Connection: First, check if the SSD is properly connected to the computer. Sometimes, the connection may be loose or the cable may be faulty, causing the computer to not recognize the
SSD.
2. Driver Issues: Another possible reason could be outdated or corrupted drivers. Check if the drivers for the SSD are up-to-date and reinstall them if necessary.
3. BIOS Settings: Sometimes, the computer's BIOS settings may need to be adjusted to properly recognize the SSD. Check the BIOS settings to ensure that the SATA controller is enabled and set to
AHCI mode.
4. Firmware Issues: If the SSD's firmware is outdated, it may cause compatibility issues with the computer's hardware and software. Check if there are any firmware updates available for the SSD
and install them if necessary.
5. Faulty SSD: Lastly, the SSD itself may be faulty. Try connecting the SSD to another computer to see if it is recognized. If not, it may need to be replaced.
Why the laptop won’t charge?
Here could be several reasons why your laptop won't charge. Here are some common causes and troubleshooting steps you can try:
1. Check the power source: Make sure the power outlet or power strip you are using is working properly. Try plugging another device into the same outlet to confirm that it is providing power.
2. Check the charging cable: Inspect the charging cable for any damage or fraying. If you notice any damage, replace the cable with a new one. Also, make sure the charging cable is properly
connected to both the laptop and the power source.
3. Check the battery: If the laptop is not charging at all, it could be an issue with the battery. Try removing the battery and plugging the laptop directly into the power source. If the laptop
turns on, then the battery may need to be replaced.
4. Check the charger: If you have access to another charger that is compatible with your laptop, try using it to see if the laptop charges. If the laptop charges with the new charger, then the
original charger may need to be replaced.
5. Check the charging port: Inspect the charging port on your laptop for any damage or debris. Use a can of compressed air to blow out any dust or debris that may be blocking the port.
6. Update drivers: Right-click the Start menu and select Device Manager, Under Batteries, open the drop-down menu and right-click Microsoft ACPI Compliant Control Method Battery, within the new
selection window, press Update Driver, then restart your PC.
If none of these steps resolve the issue, you can contact us with the serial number of the device for support.
How to fix a blue screen on the laptop?
1. Restart your laptop: Sometimes a simple restart can fix this problem. Press and hold the power button on your laptop until it turns off, then press it again to turn it back on.
2. Check for Windows updates: Outdated drivers or software can cause a blue screen error. Check for updates by going to Start Menu > Settings > Update & Security > Windows Update,
and then click "Check for updates."
3. Run a virus scan: Malware or viruses can cause a blue screen error. Run a full system scan with your antivirus software to check for any threats.
4. Check hardware components: Faulty hardware components, such as a failing hard drive or RAM, can cause a blue screen error. You can try running a hardware diagnostic test to check for any
issues.
5. Uninstall recently installed software: If the blue screen error started after you installed a new program, try uninstalling it and see if the error goes away.
6. Perform a system restore: If the blue screen error started recently and you have a restore point, you can try restoring your system to a previous state when it was working properly.
If none of these steps work, you can contact us with the serial number of the device for support.
Why the laptop screen turn black frequently?
There could be several reasons why your laptop screen turns black frequently. Here are some common causes and troubleshooting steps you can try:
1. Power settings: Check your power settings to ensure that your laptop is not set to turn off the display after a certain amount of time. To check the power settings, go to Start Menu >
Settings > System > Power & Sleep, and adjust the settings as necessary.
2. Display driver: Outdated or corrupted display drivers can cause your screen to turn black. Try updating your display drivers by going to Device Manager, selecting "Display adapters,"
right-clicking on your graphics card, and selecting "Update driver."
3. Malware or viruses: Malware or viruses can cause various problems, including a black screen issue. Run a full system scan with your antivirus software to check for any threats.
4. Overheating: Overheating can cause your laptop to shut down or the screen to turn black. Make sure that your laptop's cooling system is working properly and that the vents are not blocked.
5. Hardware issues: Faulty hardware components, such as a failing hard drive or graphics card, can cause a black screen issue. You can try running a hardware diagnostic test to check for any
issues.
6. Faulty cable: If you are using an external monitor, the cable connecting the monitor to your laptop may be faulty. Try replacing the cable to see if it fixes the issue.
If none of these steps resolve the issue,you can contact us with the serial number of the device for assistance.
Why the touchpad is not working?
There could be several reasons why your laptop touchpad is not working. Here are some common causes and troubleshooting steps you can try:
1. Touchpad disabled: Make sure that your touchpad is not disabled. You can toggle on the touchpad through the touchpad settings. Go to Start Menu > Settings > Devices > Touchpad, and
toggle on the "Touchpad" option.
2. Touchpad driver: Outdated or corrupted touchpad drivers can cause the touchpad to stop working. Try updating your touchpad drivers by going to Device Manager, selecting "Mice and other
pointing devices," right-clicking on your touchpad, and selecting "Update driver."
3. Restart laptop: Sometimes a simple restart can fix the problem. Press and hold the power button on your laptop until it turns off, then press it again to turn it back on.
4. Check touchpad settings: Check the touchpad settings to make sure they are set up correctly. Go to Start Menu > Settings > Devices > Touchpad, and adjust the settings as
necessary.
5. Clean touchpad: A dirty touchpad can cause problems. Clean your touchpad with a soft, damp cloth.
6. If you are unable to use the touchpad, you can connect an external mouse to your laptop as a temporary solution until the issue is resolved.
My laptop is fully charged and the charging indicator light is green, but why won't it boot?
1. Disassemble the bottom case to see if the SSD is unscrewed, check if the drive is plugged in properly into the motherboard.
2. If the issue persists, if the issue persists, please contact us for assistance to try to update hard drive drivers or enable hard drive in BIOS.
3. Please remember to back up your data regularly to prevent unexpected loss.
Does CHUWI laptops come with Microsoft office or do I need to buy it separately ?
CHUWI laptops doesn't have free Office softwares preinstalled, customers need to buy office product key separately.
Why my laptop goes straight to the boot setting interface after I press the power button?
If there's notification said that the hardware cannot be recognized, then it mighty need a repair, otherwise, please provide us the serial number to reinstall the system.
How can I stop Windows 10 update?
Press the Windows logo key + R at the same time to invoke the Run box.
Type services.msc and press Enter.
Scroll down to Windows Update, and double-click it.
In Startup type, select Disabled. Then click Apply and OK to save the settings
Why the fan runs with much noise than before?
There are several reasons why your PC fan may be running with much noise than before:
1. Dust build-up: Dust build-up inside your PC can cause your fan to work harder to cool your PC, resulting in increased noise. Over time, dust can accumulate on your fan blades, causing them to become unbalanced and vibrate, which can cause noise.
2. Overheating: If your PC is running too hot, your fan may be working harder to keep it cool, resulting in increased noise. This can be caused by a variety of factors, such as a malfunctioning fan, a clogged air vent, or a malfunctioning heat sink.
3. Fan bearings: Over time, the bearings in your fan can wear out, causing the fan to make noise. This is a common issue with older fans, and the only solution is to replace the fan.
4. Fan speed settings: If your fan speed settings are set too high, your fan may be running louder than necessary. You can adjust the fan speed settings in your PC's BIOS or using software designed for this purpose.
5. Malfunctioning fan controller: If your PC has a fan controller, it may be malfunctioning, causing your fan to run louder than necessary. You may need to replace the fan controller.
In general, if your PC fan is running with much noise than before, it's a sign that something is not working correctly. You should investigate the issue to identify the cause and take appropriate measures to fix it.
Why the PC can’t read my hard drive?
There are several reasons why your PC may not be able to read your hard drive. Here are some common causes:
1. Physical Damage: Physical damage to your hard drive, such as a broken connector or damage to the disk platters, can prevent your PC from reading the hard drive.
2. Connection Issues: Loose or faulty connections between the hard drive and the PC can prevent the PC from reading the hard drive. Check the cables and connectors to ensure they are properly connected.
3. File System Corruption: If the file system on your hard drive is corrupted, your PC may not be able to read it. This can be caused by improper shut down, virus/malware infection, or other issues. In such cases, you may need to repair the file system or recover your data from the hard drive.
4. Outdated Drivers: Outdated or missing drivers for your hard drive can prevent your PC from reading it. You can update your drivers through your PC's device manager or from the manufacturer's website.
5. BIOS Settings: If your PC's BIOS settings are not configured correctly, it may not be able to read your hard drive. Check the BIOS settings to ensure that the hard drive is properly detected and configured.
6. Failing Hard Drive: If none of the above issues are the cause, it's possible that your hard drive is failing. In such cases, you should take immediate steps to back up your data and replace the hard drive.
If you are unable to determine the cause of the problem, you can contact us with the serial number of the device for assistance.
Why the WiFi connection is unstable and slow on my PC?
If you're experiencing an unstable and slow connection, here are some solutions you can try:
1. Move closer to the router: If you are far away from your router, your PC may have trouble maintaining a stable connection. Move closer to the router to see if this improves the stability and speed of your connection.
2. Change the channel: If you're using a 2.4 GHz frequency, there may be interference from other devices that use the same frequency. Change the channel on your router to reduce interference and improve your WiFi connection.
3. Update your drivers: Make sure that your wireless network adapter drivers are up-to-date. Check the manufacturer's website for the latest drivers.
4. Reset your router: Reset your router by turning it off and then on again. This can help clear any connection issues that may be affecting your WiFi connection.
5. Use 5 GHz frequency: If your PC supports it, switch to the 5 GHz frequency band. This frequency band is less congested and can provide a more stable and faster connection.
6. Use a WiFi extender: If you're experiencing a weak signal, consider using a WiFi extender to boost your signal strength.
7. Check for firmware updates: Check your router's firmware and make sure it's up-to-date. Firmware updates can improve the performance and stability of your router.
If none of these solutions work, you may need to contact us with the serial number of the device for assistance.
How can I set up multi-monitor with my Mini PC?
To set up multi-monitors on your Mini PC, you can follow these steps:
1. Connect your monitors to the Mini PC. Make sure that the Mini PC has the necessary ports to connect multiple monitors.
2. Right-click on the desktop and select "Display settings" from the context menu.
3. In the Display settings window, you should see all of the monitors that are connected to your Mini PC. If a monitor is not detected, click on "Detect" to search for it.
4. Select the monitor that you want to customize and adjust its settings, such as the resolution, orientation, and scaling. You can also choose to extend or duplicate your display across multiple monitors.
5. Repeat step 4 for all of the monitors that you want to customize.
6. To arrange the monitors, click on "Identify" to display the numbers on each monitor. Then, drag and drop the monitors to their desired position.
7. Once you've arranged the monitors, click on "Apply" to save the changes.
8. If you want to make any additional adjustments, click on "Advanced display settings" to access more advanced display settings.
9. You can also adjust the taskbar settings for each monitor. To do this, click on "Taskbar settings" and select the taskbar location for each monitor.
That's it! You should now have your multi-monitor setup configured on your Mini PC.
How can I set the Wake on LAN function?
To set up Wake on LAN (WOL) on your Mini PC, follow these steps:
1. Make sure that your Mini PC is connected to a LAN network with a wired connection.
2. Obtain the MAC address of your Mini PC. You can find this in the Windows Device Manager or by using the ipconfig command in the Command Prompt. Note down the MAC address.
3. Configure your router to enable Wake on LAN. This can usually be done by accessing your router's settings through a web browser and enabling WOL.
4. Download a Wake on LAN app on your smartphone or computer, such as the Wake on LAN app for Windows or the Fing app for iOS or Android.
5. In the Wake on LAN app, enter the MAC address of your Mini PC and the IP address of your router.
6. Save the settings and close the app.
7. Shutdown your Mini PC and test the Wake on LAN function by using the Wake on LAN app to wake up your Mini PC.
Note: Wake on LAN only works with a wired network connection, not a wireless connection. Also, some routers may have different settings and options for WOL, so refer to your router's manual or support website for specific instructions.
How can I use remote desktop on my Mini PC?
To use Remote Desktop on your Mini PC, follow these steps:
1. Enable Remote Desktop on your Mini PC. You can do this by going to "Settings" > "System" > "Remote Desktop" and turning on the "Enable Remote Desktop" toggle switch.
2. Configure Remote Desktop settings. You can set options such as allowing remote connections from any version of Remote Desktop or only from PCs running Remote Desktop with Network Level Authentication.
3. Determine the IP address of your Mini PC. You can find this by going to "Settings" > "Network & Internet" > "Ethernet" or "Wi-Fi" (depending on how your Mini PC is connected to the network) > "Properties". Note down the IP address.
4. On the computer you want to use to remotely access your Mini PC, launch Remote Desktop Connection. This can be found by typing "Remote Desktop Connection" in the Windows search bar.
5. In Remote Desktop Connection, type in the IP address of your Mini PC and click "Connect". You may need to enter your Mini PC's login credentials.
6. If successful, you should now be remotely connected to your Mini PC.
Note: Make sure that the Mini PC is turned on and connected to the network before attempting to connect remotely. Also, some network configurations and firewalls may block Remote Desktop connections, so you may need to adjust your network settings accordingly.
Will my warranty remain valid if I install Linus or disassemble my PC to upgrade memory or storage?
Sure, the warranty will remain valid, but if your device were damaged due to modification, the warranty shall be rendered null.
Will my warranty remain valid if I install Linus or disassemble my PC to upgrade memory or storage?
While the warranty will still be valid, any modifications made to the device that result in damage will nullify the warranty.
Can I cancel my order?
If your order has not been shipped, you can cancel your order by contacting store@chuwi.com. Please note that due to the time difference between countries, we cannot guarantee that the cancellation will be successful. If your order has been dispatched, it cannot be cancelled.
Once I have placed my order, how long will it take for the parcel to be dispatched?
We usually need one day to prepare your order before dispatch.
Which warehouse should I choose before placing the order?
Our warehouses are located in the EU, USA, Japan, UK, and China for maximum delivery efficiency. You can select the nearest warehouse location to place your order.
How many days will it take for the shipping?
1. Warehouse in EU can only ship item to customers in EU countries, delivery will be finished within 1-6 days.
2. Warehouse in USA can only ship item to customer in United States of America, delivery will be finished within 1-4 days.
3. Warehouse in Japan can only ship item to customer in Japan, delivery will be finished within 1-4 days.
4. Warehouse in UK can only ship to customers in UK, delivery can be made within 1-3 days.
5. Warehouse in China can ship worldwide. Delivery is possible in about 3-12 days, except for Russia and some remote countries or regions.
Are there shipping charges for repeated delivery, rejected packages, or returned packages without reason?
Yes. The recipient will be responsible for additional delivery charges if the delivery failure is caused by the recipient. Shipping charges for product returns due to order cancellation or package refusal after goods have been shipped are at the recipient's expense and will be deducted from the refund. Delivery charges for unwarranted returns are the responsibility of the customer and will be deducted from the refund.
Do I need to pay for the delivery?
For orders over $130, we offer free delivery service except for remote countries and regions. Delivery charges for orders under $130 will be displayed at checkout after you enter the delivery address.
Does CHUWI ship to distant countries and regions?
Yes, CHUWI will ship orders worldwide. However, customers in remote areas may experience a 1-2 day delay in receiving their order.
What should I do if my payment failed?
If your online payment failed, you can take the following steps:
1. Check your payment information: Make sure you have entered all payment details correctly, including card number, expiration date, security code, and billing address.
2. Contact your bank or payment provider: If you are certain that the payment details are correct, contact your bank or payment provider to inquire about the issue. Sometimes, a payment may be declined due to insufficient funds or a temporary hold on your account.
3. Try an alternative payment method: If your payment fails repeatedly, try an alternative payment method such as a different credit card or PayPal.
4. Wait and try again: Sometimes payment failures can be temporary, so you can try again later or wait until the issue is resolved.
Can I cancel my order?
If your order has not been shipped, you can cancel your order by contacting store@chuwi.com. Please note that due to the time difference between countries, we cannot guarantee that the cancellation will be successful. If your order has been dispatched, it cannot be cancelled.
Do I have to pay customs duty?
Orders shipped from China warehouses are subject to the following customs policy.
The price of our products shown to customs is only $80-$120 to save you customs duty.
For example, if you need to pay 2% tariff according to your law, it will be calculated according to our customs clearance price. ($120-a)*2% (If you need to declare the normal amount, please make a note when you place your order.
How to use a coupon code?
Copy the code and you can use it at checkout.

